Wednesday, September 7, 2016

Ecclectic Gir's Bedroom- using black furniture in a kids room. Cheap, Easy & Fast decorating.


This is not a sponsored post. 

Hello blog world :)

I've missed you! I've been so busy with the family and cycling that I really haven't done much in the way of decorating. However, yesterday I got in my little girl's room to clean up and I added some things she had sitting in her closet. I wanted to share the update with you guys.

Let me tell you, it takes no time for my kids to completely destroy their rooms after everything is put together. Is that just my house? Even though THEY are primarily responsible for keeping their rooms clean. Even though they are so excited and in love after I get in there and get everything reorganized and they are finding things they haven't seen in a year. I don't know how many times I can quote my daughter saying "I am never going to mess this up! My room looks amazing!".

Yeahhhhhh. It always somehow goes back to disaster status a lot faster than I expected. But for now, it's clean and I took pictures so I could remember this moment.

I often struggle so much with wanting to keep things simple that I actually get anxious when I feel like I'm adding too much or start feeling overwhelmed with too much stuff. Sometimes adding a little more can give you a more balanced space. I love command strips for anything I can hang because it gives me the option to hang things without needing to repair the wall if I decide I don't like it.

Obviously I am not a designer. I eyeball everything. Meaning, I look at it and if it looks good and balanced to me then I leave it that way. If it doesn't, I rearrange. I am SO all about using what you have. That can be super frustrating sometimes. Trying to find a way to make pieces work when you have an idea in your head of what WOULD work can be maddening. I know two hutches on either side would be beautiful, but I only have one. Also, I have a lot of black furniture I picked up from a garage sale on the cheap. So I need to find a way to balance the room without the cost and labor of painting. I don't like painting if I don't have to. There are just other things I'd rather be doing. So the following is what I ended up with.

Here are her initial before and afters:


And here is where we ended up:


I added the other side table, giving her more room and adding width to match the hutch on the other side. I've had this little shelf floating around the house with no place to fit in so I used it in here when no one wanted to buy it from me for 20 bucks. I can't decide if I like it at the foot of the bed or not.

Everything you see was either thrifted, garage sale finds or stuff I had in my attic. With the exception of the rugs, a couple of pillows and these cute little things:


I scored them all at Hobby Lobby's 90% off sale! That's right... 90% off! Those little things on the wall cost me $1 ea.! I couldn't believe all the cute stuff they had. I was surprised to see the things no one else wanted. I did! And it would tie in with the black furniture beautifully. 

Overall, I'm happy with the way it turned out considering I used everything I already had and didn't paint anything but the walls. Fast, easy and cheap. It's not the prettiest... but it's the way I like it! 

Hope you enjoyed this post. Feel free to post any comments or questions. I love hearing feedback from everyone. Until next time....

Friday, August 19, 2016

Fireplace Makeover- How I Painted My Fireplace & How it's Held Up


This is not a sponsored post.

Recently I had some questions about how I painted my fireplace that I haven't answered in previous posts. I thought I'd do that today. 

First, here is my fireplace before & after:

Before:

1977 Asymmetrical Fireplace with Bookshelf 

After:


This fireplace was such a source of frustration to me when we first moved in. I didn't know what to do with it without demolition. As you know, this blog is about decorating on the cheap. There is no way I was going to pay for that. I searched Pinterest and eventually found myself on Jenna Sue's blog. There I found my inspiration and got to work!

Painting the fireplace.

Before painting I took a bristle brush and cleaned the entire fireplace to get rid of dust and dirt. Then primer. My favorite primer is Valspar bonding primer. You can use a brush or a roller for this. I used both. Then came the Sherwin WIlliams semi gloss in Summer White. I used a standard roller made for smooth surfaces on the surface of the bricks and a brush on the mortar between the bricks. 

And the same thing on the bookshelf, EXCEPT that I recommend using FLORTROL. A paint additive that reduces brush and roller marks, as well as drying time. It's the best thing you can use on any kind of furniture or cabinetry if you want a more professional looking finish. 

I recommend waiting 24 hours with between coats.

How has it held up?

It's been three years since I've painted the fireplace and it pretty much looks just like it did three years ago except that which you'd expect with use. I have NOT used the fireplace at all since we moved here, so I do not know how the heat would impact the paint job. I can say that I learned to to apply more coats to brick that may be a traffic area. We have to step up onto the fireplace to reach our bookshelf so that area tended to grab dirt and was hard to clean. This is because the brick is so porous. More coats help with that, but be careful. You don't want to apply too many, too soon. It will peel. Make sure you let the coats cure in between. This does drag out the process, but you'll be trying to remove paint and paint again if you don't. Take my word for it. 

So take your time and be patient. If you do, you will have a lasting finish. 

Happy painting! :)


Friday, August 12, 2016

1977 Asymmetrical Brick Wall Fireplace Living Room update- Creating a peaceful living space.


This is not a sponsored post.

Hi guys! :)

Today I wanted to share more on the painted pieces in our living room update.

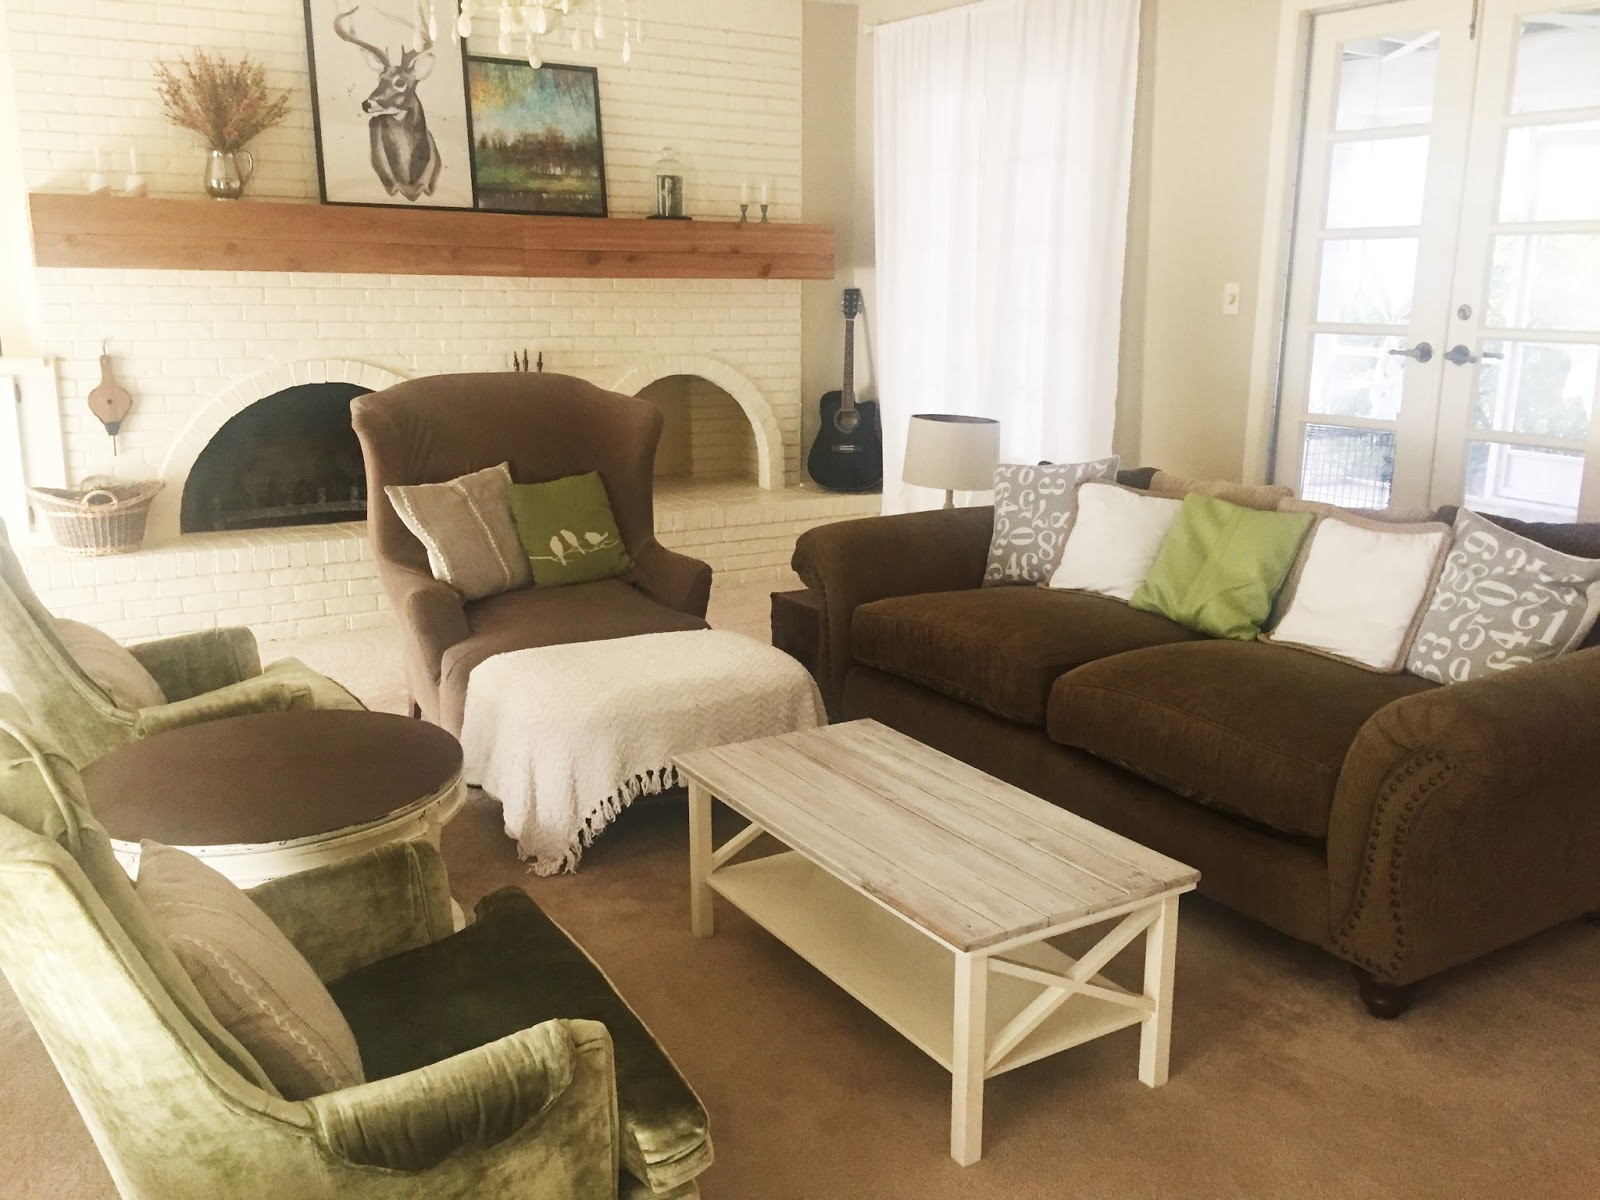
Previously I shared with you guys what our living room looked like when we bought the house:

1977 Asymmetrical brick wall fireplace with bookshelf.

And what it looks like now (with some minor changes since the first post):


But I didn't share part of the makeover like the coffee table:


This makeover was so easy! Adding wood planks to a damaged table top is a great way to restore and strengthen! Just remember to drill holes where you want your screws. This was a thrift store find for $15. The paint color is Sherwin Williams summer white in a semi gloss finish. The planks are dry brushed primer and a poly coat to seal. I will be sharing more later about the best products I have found for a lasting finish. This table is almost a year old since the refinish and is holding up beautifully. 

Or the piano makeover:
Piano Before


Or the Dresser:


$20 Garage sale find. Only needed a little caulk and some paint and she is good as new.
I hope to run across a before picture somewhere for you guys. Until then, I really need to get better about taking before pictures. 
For furniture refinishes I like to roll on a coat of Valspar bonding primer using a cabinet foam roller. It keeps you from having to sand first and it sticks to glossy surfaces. Just let it dry for 24 hours in between coats. It makes the biggest different in the adherence.

I like Sherwin Williams semi gloss paints the best out of all I have used. They seem more durable. They put on a lot of sales and let you combine coupons. Though I have used olympic paints and gotten a good results, the Sherwin Williams paints are much longer lasting in my personal opinion.

My biggest secret to a professional finish is FLOTROL. A paint additive that makes the paint roll on more smoothly, evenly and prevent brush and roller marks. It also decreases drying time. I LOVE the stuff! I use a cabinet foam roller to apply paint unless the piece is ornate. In that case I use my sprayer. More on that another time. I was able to use a brush and roller for all of these pieces thanks to FLOTROL.

To keep from having to move the furniture outside (because it's freaking heavy), I roll the pain (Yes I said pain. Painting sucks.) on inside and just lay plastic under it first. I recommend letting each new coat of primer/paint dry for 24 hours in between. It really makes a big difference. The biggest key to a great finish is patience. And did I mention FLOTROL?

That's all for today. My kids are driving me as crazy as my inability to add more detail to this post. Thanks ADHD. Now I must go and offer them the food peace offering they are demanding of me lest they have to make something for themselves and forget how to keep jelly on the plate instead of the cabinets, walls and floors.

Which brings me to the following question;

Why is the floor still sticky after the kids clean a spill? Or the husband, for that matter. They are so stinking smart, all of them. You would think it wouldn't be beyond them.

Well... I better go prevent this from happening. Thanks for reading and I hope you enjoyed this post. As always, please comment with any questions!

Saturday, June 4, 2016

Little Girl's Budget Bedroom Makeover

This is not a sponsored post.

Here is my little girl's budget bedroom make over. The goal was to use what we had with minimal work and expense. Although I do list the prices for things I bought over the years, they've been in the room for years. I decided to use the current colors rather than paint the furniture to save on time and money.

Before:
After:


Canopy: Thrifted $6

White comforter: Kohl's Clearence $10

Black comforter: Garage sale $1

Pink rug: Kohl's clearance $5

Black & White rug: Hobby Lobby clearance $6

Pillows: Garages Sales $1-$2 each

Black & White Pillow: Hobby Lobby $8.50

Camera Wall Art: Hobby Lobby $17

Penguin Art: Free. My little girl made it and I framed it with frames I already had.

Side Table: Garage Sale $5

Hutch: Craigslist $100

Lamp: Walmart $10

Paint: Lowe's Olympic matched to Sherwin Williams White Dogwood
Hope you enjoyed this post. As always... if you have any questions please comment. Until next time :)

Monday, May 23, 2016

Keeping it Simple: Decor to Offset a Small, Awkward and Off Center Space

This is not a sponsored post.

Here is a quick share on my off center closet door (that actually leads to a 1977 wetbar. (We will get to that later). Sometimes it's hard to know what to do with a space like that.

This house is full of awkward spaces and it seems like NOTNING is centered! GAH! I'm a just a little OCD so this drove me crazy in the beginning, however, I have come to love my awkward spaces and found ways to let them shine beautiful character throughout my home.

The first awkward space I worked with was my off centered, 1970's fireplace. You can see that here.

For today's space I chose to balance with some meaningful photos of my kids and their favorite memories I had printed from my Instagram via Walgreen's. Then I fashioned them to the wall with Command Strips. I love those things!

I don't have a lot of family photos up in my house, but I love the very candid, real life - non posed photos. They are the best form of art for me. I love imperfect. I love real. I don't too much care for anything perfect or those perfectly posed pictures. They are not my thing. 

Just to note, what's funny about that is that I was once a professional photographer and loved my job. I'm just drawn to the capture of real life memories. 

That's just me. 

Moving on. I also love plants. I love green and the outdoors. I mention this because I believe in decorating with what you love. You'll be happier in your space. I try to bring the outside in as much as I can without cluttering up the place. 

Here is my little simple (did I mention I also love simple?) reveal:

I wish I had a before photo for you so you could see the serious transformation. I have GOT to get better about that. I have a partial before that includes the stairs and lovely worn linoleum: 

After:


New light fixture coming someday. This whole space was updated with paint, resilient vinyl wood plank flooring, and the stairs de-carpeted and DIY'd to what you see now. More on that another time.


I found the (Bombay) plant stand @ Goodwill (for 10 bucks, which is kind of a big score!) and painted the same color as the door (Rustoleum Dark Walnut) 


The plant (creeping fig) was a Lowe's clearance score (half off)! Woo hoo! A little water and she was good to grow. 


The frames, believe it or not, are dollar tree. I love them. They are the recessed kind and had mats included! 


I thought about leaving the space blank, but it felt like it needed something and I needed to put up some pictures of my kids since my office is the only place I had any. So that's what I decided to do and I'm happy with the turnout. I love decorating, but I'm all about keeping things clean, simple, working & spending less. 

After all... we Americans could use a slow down. All of us stressed out to the max chasing material things and trying to help our kids chase their dreams. Less is more. Decorating is my passion so I know how hard it can be to stop working on it to strengthen my relationships. Because, after all... in the end... they are all that matter. 

The struggle is real. 

Thanks for reading, guys. You're the best. 

Until next time...


Sunday, May 15, 2016

How to Design & Decorate on the Cheap. Finding the deals & steals.

This is not a sponsored post.

I recently had a friend ask if I could put together a how to on budget shopping (shoutout, Melissa! & Thanks!).

I thought I would write a post on how I save on design and decorating for anyone else who might be interested as well.

Number One- Design 

There is no faster way to accumulate clutter and waste money than not having a plan first. Ask me how I know! I do not use a design software and I can't draw. That's because I don't have to. Instead I copy. There is so much inspiration on Pinterest, home magazines, Instagram, blogs and home & DIY websites. I find a room I love and copy it. It doesn't turn out exactly like my inspiration photos most of the time. I don't want it to. And it's free. I add my own style and items based on things I find for cheap or already have that will work. I save a ton of $$$ this way.

Garage Sales & Resale Shops

Obviously you can get amazing prices at garage sales and resale shops a lot more often than you can online or in stores. Not all resale or garage sale prices are great deals. You can get a great price on a shelf, but if it's a particle board POS then you'll be shelling out time, energy and money to get rid of it and replace it later.

Then there is the impulse buying factor. You know that if you choose to wait, it won't be available later. Which means you either regret buying or not buying later. It also means you accumulate clutter. Quick. It's easy to buy stuff because it's cheap and not because you need it. The following are my personal resale and garage sale buying guidelines that help keep me from impulse buying:

1) If I can't think of a place for it to go, I don't buy it. Even if I love it and it's cheap. UNLESS, I am willing to replace something with it. If I find an adorable lamp, but I already have a lamp... then I ask myself if it's worth spending the money on the new lamp to replace the old one.

2) I keep a list of things I need to look for. This keeps me focused and also helps me remember what I went in for in the first place. You know... mom brain. That's my excuse and I'm using it until the kids are gone. When I can't use it anymore then I will blame it on old age.

3) I only buy good quality. If I get tired of looking for it, I will look into building or DIYing it.

4) I avoid estate sales like the plague. There's just too much emotional attachment to things. Hence the high prices. Church sales, resale shops, charity sales on donated items hold a lot less emotional attachment and you get a MUCH better price.

5) Check curbside. My living room sofa and wing-back chair were curbside finds.
My living room
Well, the wing-back was given to me by a neighbor who was getting ready to throw it to the curb. Where I would have taken it.

My family and friends can attest that this is me to a "T"!:
Via Pinterest

You can tell yourself that you'll be recycling and keeping things from the dump that only need a little cleaning up. (This is how I make myself feel okay with trash digging ;). But be careful... this quickly turns into hoarding and clutter as well if you're not careful. I have seen it over and over.

Decide on the pieces you love the most and don't pick up any more until they are made-over and in their places.


Goodwill

Oh Goodwill. Sigh. Sometimes I can find good deals on home decor items. I feel that you can no longer find good deals on furniture here, unfortunately. I have three Goodwill's that I will pop into and it seems like the pricing is different based on who is pricing that day. Still... the prices on their furniture is outrageous to me. I guess it depends on what it is. If I bought furniture from Goodwill it would only be some big expensive name brand where their price is at least 80-90% the original cost. I prefer to find other resale shops for my furniture and home items. IF you must shop Goodwill, it's best to shop often... usually a Monday or Tuesday since they get garage sale leftovers on weekends. You'll have the best selection then. OR find a Goodwill outlet store. Now those are pretty awesome. I like those. Find your local Goodwill Outlet Store here. My first Goodwill Outlet experience happened in Austin, TX. I live in Houston, TX. It's totally worth the drive to me.

As far decor items, I guess I would apply the same principle.

Finding Retail Deals

I find a lot of deals in store. Especially grocery stores or stores you wouldn't normally shop for home decor. The thing is just that. Nobody really shops for home decor in a grocery store so most of the time it doesn't sell and ends up on clearance shelves @ a deep discount. At least where I live. When I shop in store I usually will not buy anything that's not at least a 75% mark down. You also want to shop places that will let you stack coupons with clearance sales. Kroger will let you use their home coupons on clearance items.

I LOVE Kohl's coupon policy. They will let you stack multiple coupons WITH clearance items.

I do more shopping online than in store, usually... but we will get to that in a minute. First I want to mention that you won't know if you're getting a good deal if you don't have a good idea of what an item costs. So shop around. Impulse buying is the fastest way to overspending. Be patient. Even if you miss a deal on something. You'll find another deal on the item later or you'll find a great deal on something else you love that will work equally as well.

Online Shopping

I find amazing deals through coupon blogs like Hip2savePassionate Penny PincherPenny Penchin' Mom & My Frugal Adventures. They will keep you posted! I follow them on Facebook so I'm always seeing the deals in my feed.

Before I buy anything for a "great online deal" I make sure it really is a great deal. One way to do quick research is to Google and item then click on the shopping tab. From there you can refine your search to list products from low to high in price.


Using What You Have

This is my favorite way to decorate. Also most frustrating. This is because sometimes I can get creative or find I already have something that works, and sometimes I spend way too much time and energy on trying to make something work that just isn't going to work.

Humorous print, "Maybe swearing will help", Black and White printable, Swear quote, Office wall decor, Funny print, Humorous print, Wall art:
Via Etsy

 I love decorating but I don't like spending money on it.
I get so many hand-me-downs from my older sisters and cousins and I buy so many of my clothes at Goodwill that I think ten dollars is a ridiculous amount to spend on a shirt.:
I have learned to donate what doesn't work and find something that does.

I absolutely love displaying old or sentimental items. Have old letters? Put them on display! It's much more meaningful artwork or rolled up filler. Old camera's? Old books? Pinterest is a wealth of creativity and ideas for how to display things and get them out of your closet. Anything you can't find a place for... get rid of it. Sell it for cash or donate it. But remember...

a clean house is a pretty house.

It's my belief that stuff weighs people down. Gives you something to worry about. I love quality because it lasts longer but only when I can buy it used for deep discounts. I don't want to pay a lot of money for anything because then I'll worry over it. That's just me. I don't want a lot of stuff because it overwhelms me. That's just me. I like things simple.

DIY

Do it yourself. Buy supplies. Make stuff. Save tons of money every time.

The truth is DIY is NOT always cheaper.
Why buy it for $7 when you can make it yourself for $92 worth of craft supplies?!:

Compare the cost and time required for building or DIY'ing verses the time and cost of finding what you need at a garage sales or resale shops. A reoccurring theme in this blog post is patience. Slow down. Don't get in a hurry. That's how you'll find a better DIY plan, or sweet deal on someting that will work without all the work ;)

The Best for Last
The best way to create a beautiful space is through your attitude. And that costs zilch. Nada. Nothing. In the end... how people feel when they are in your home comes from more than the decor.

Pretty Is As Pretty Does - words that every good Southern girl was brought up hearing from their mamas and grandmamas:


Thanks for reading! I hope someone out there finds this helpful. Please let me know if you feel like I left anything out or if you have any questions!


Tuesday, May 10, 2016

Farmhouse Half Bath Reveal!

This is not a sponsored post.

Phew! It seems like it's taken us forever to complete this half bath project. All of our projects seem to happen a little here and there until, over time they are finally complete. Family life is so stinking busy with three kids. We try to balance home, work, kids, hobbies, chores, errands ect... so we are a bit slow in our completion of things. But they DO get completed... eventually. Actually... I still have caulking and painting to do, but I promised a post soon so here it is. Caulking and painting later.

Onto the reveal...

Before:

Unfortunately, this is the only before picture I have. Because I have to get better about taking before photos. You can't see it but the fiberglass sink is cracked and disgusting. Especially around the drain. Just like all the sinks and tubs in this house. There was also cracked and very VERY worn (with holes in it) white "tile" linoleum on the floor before we tore it out and laid down resilient vinyl wood plank flooring.

During:
What a mess!

This project, like all of the projects, took a lot longer and was more labor intensive than I anticipated. And like all projects... nothing went according to plan.

This is me tired of installing sheetrock while the hubby was at work: 

We discovered mold in the walls, cut out the moldy sheetrock all around the room and installed new sheetrock. 
Our initial plan was just to paint to save time and money. However, hubby and I discovered that neither one of us is good at the mud work (patching and texturing drywall) part of drywall and we set off for a solution that would keep us from having to hire someone to finish it for us. 

So we slapped some sloppy coats of "mud"on and we ship-lapped over it. 

After:
We did not replace the cabinet. I painted it (painting tutorial and up close photos coming soon), and gave it a new counter top, sink and spray painted hardware. I use Rustoleum car primer first, then finish with Rustoleum spray paint for the drawer and cabinet pulls. The lantern light fixture was an outdoor Amazon find for $25. I'm a bit disappointed in my decision to buy it because I find great light fixtures at garage sales frequently. In fact, all of my "new" fixtures have been garage sale finds that I've not paid over $5 for. Well... too late now. Moving on.

Foliage artwork inspired by Jenna Sue! Find her how to here. If you guys don't already know, Jenna Sue is my hero. 


Lowe's cut sheets of plywood into 12" strips for us for free. We could have saved a significant amount by doing this with sheets of MDF (medium density fiberboard). I'm not sure why I didn't do that. I blame mom brain.

Like the kitchen, the half bath sports a DIY wood counter top (how to and follow up post coming soon). We had to get creative to fit the under-mount sink in. The cabinet did not have the support the sink needed so we had to improvise. Which is why it looks like we have a stacked counter top. I'm just glad it's functional at this point.

I want to talk about the faucet. I mentioned in a previous post that I scored big on faucets on Amazon. This is one of the faucets I was talking about. It's a MR direct (sir faucet) lavatory faucet. When I bought it, the retail price was $699!!! The sale price was $49. Now, I'm pretty skeptical about those retail prices, but the faucet had great reviews and the price was way better than what I would find at Lowe's or Home Depot. The faucet has been installed for over a year and we love it. We have had absolutely NO problems at all!

Overall project cost: Roughly $500. Frowney face. Updating the kitchen and bathroom have been our most expensive projects. Both costing more than I wanted or anticipated. Atleast with the kitchen we had hired help. The total includes our sheetrock, paint, lumber, supplies, light fixture, sink, faucet, mirror, trim & resilient vinyl plank wood floor. And a whole lot of elbow grease. Some things we already had on hand...but most of it was bought specifically for this project. There was definitely room for more saving. We seem to span these projects over a super long period of time, as I mentioned, so we don't feel the sting of taking it all at once. Still... as I am learning through this experience am always learning of news ways to cut costs and that will inspire future posts.

I love the look of the "planked" walls and can't wait to do it to our other bathrooms! The total cost for planking this tiny half bath was still $170. This includes plywood, trim & caulk. I could have saved $30 right off the bat just by having Lowe's rip MDF instead of plywood. You don't get the wood grain but it still looks nice and it's a way to save 30 bucks.

Thank you for reading. As always, if you have any questions, or things you'd like to know/see please comment!

I hope you enjoyed this post. Until next time....